Having a good terminal console on OS X in 2015
- Installing ITerm2
- Adding some colors to the console
- Using ITerm2 : panes, tabs, profiles and window arrangements
- Wrapping up
As a programmer, your terminal console is part of your everyday life. That's where you launch your local server, start your database, see your heroku logs, try out that mysterious command you found on some forum, etc. Don't try to escape it; instead, learn to master it and make it comfortable enough that you feel at home using it.
My current choice for a terminal on OSX is ITerm2 (official website).
Installing ITerm2
Nothing tricky here, just download it from the official website. What you get is a zip archive that unpacks to a .app file. All you have to do is move that file to your Applications folder.
Adding some colors to the console
I like my console to have a dark background because it's easier on the eyes and environment-friendly. Also I want to see some relevant information like current *nix user and current directory.
For this I use a little shell script :
  # COLORFUL PROMPT
  # uncomment for a colored prompt, if the terminal has the capability; turned
  # off by default to not distract the user: the focus in a terminal window
  # should be on the output of commands, not on the prompt
  force_color_prompt=yes
  if [ -n "$force_color_prompt" ]; then
    if [ -x /usr/bin/tput ] && tput setaf 1 >&/dev/null; then
      # We have color support; assume it's compliant with Ecma-48
      # (ISO/IEC-6429). (Lack of such support is extremely rare, and such
      # a case would tend to support setf rather than setaf.)
      color_prompt=yes
    else
      color_prompt=
    fi
  fi
  # ANSI color codes
  RS="\[\033[0m\]"  # reset
  HC="\[\033[1m\]"  # hicolor
  UL="\[\033[4m\]"  # underline
  INV="\[\033[7m\]"  # inverse background and foreground
  FBLK="\[\033[30m\]" # foreground black
  FRED="\[\033[31m\]" # foreground red
  FGRN="\[\033[32m\]" # foreground green
  FYEL="\[\033[33m\]" # foreground yellow
  FBLE="\[\033[34m\]" # foreground blue
  FMAG="\[\033[35m\]" # foreground magenta
  FCYN="\[\033[36m\]" # foreground cyan
  FWHT="\[\033[37m\]" # foreground white
  BBLK="\[\033[40m\]" # background black
  BRED="\[\033[41m\]" # background red
  BGRN="\[\033[42m\]" # background green
  BYEL="\[\033[43m\]" # background yellow
  BBLE="\[\033[44m\]" # background blue
  BMAG="\[\033[45m\]" # background magenta
  BCYN="\[\033[46m\]" # background cyan
  BWHT="\[\033[47m\]" # background white
  #variables pointing to ANSI color codes
  USER_CLR="$RS$HC$FGRN" # the color of the user name, e.g 'val'
  HOST_CLR="$RS$FYEL" # the color of the host, e.g 'VVV-SATELLITE-P850'
  LOC_CLR="$RS$FGRN" # the color of the location, e.g '~/Documents'
  MISC_CLR="$RS$HC$FYEL" # the color of other symbols
  if [ "$color_prompt" = yes ]; then
    #PS1='${debian_chroot:+($debian_chroot)}\[\033[01;32m\]\u@\h\[\033[00m\]:\[\033[01;34m\]\w\[\033[00m\]\$ '
    # primary prompt : contains special characters an sequences for additional info about a session.
    #PS1="$HC$FYEL[ $FBLE${debian_chroot:+($debian_chroot)}\u$FYEL: $FBLE\w $FYEL]\\$ $RS"
    PS1="$HC$MISC_CLR[ $USER_CLR\u$HOST_CLR@\h: $LOC_CLR\w $MISC_CLR]\n$USER_CLR\\$ $RS"
    # secondary prompt shows just '>'
    PS2="$HC$FYEL> $RS"
  else
    #PS1='${debian_chroot:+($debian_chroot)}\u@\h:\w\$ '
    # primary prompt : contains special characters an sequences for additional info about a session.
    PS1="[ \u: \w ]\\$ "
    # secondary prompt shows just '>'
    PS2="> "
  fi
  unset color_prompt force_color_prompt
To use it, I created a colorfulprompt.sh file with the above content which I put in a ~/.mybashconfig directory, then called it from my ~/.bashprofile file (which is in charge of initializing my terminal) by adding these lines to it:
~/.bash_profile
  # enable colorful prompt
  source ~/.my_bash_config/colorful_prompt.sh
You can do it all with a simple text editor like TextMate. Don't hesitate to change the colors to your liking, it should be easy from the above code. Note that this also works on other *nix operating systems, not just OSX.
Now you have a pretty terminal, which is the first step towards loving to work in the command line. Next step is to make it more ergonomic.
Using ITerm2 : panes, tabs, profiles and window arrangements
Organizing
The first thing I find practical in ITerm2 is the possibility to have several shell sessions open next to each other in the same window. When using ITerm2, you can have several windows, each window has several tabs, each tab is split into panes.
I recommend using only one window, making it full-screen, and having many tabs each split into a few panes. It all looks like this :
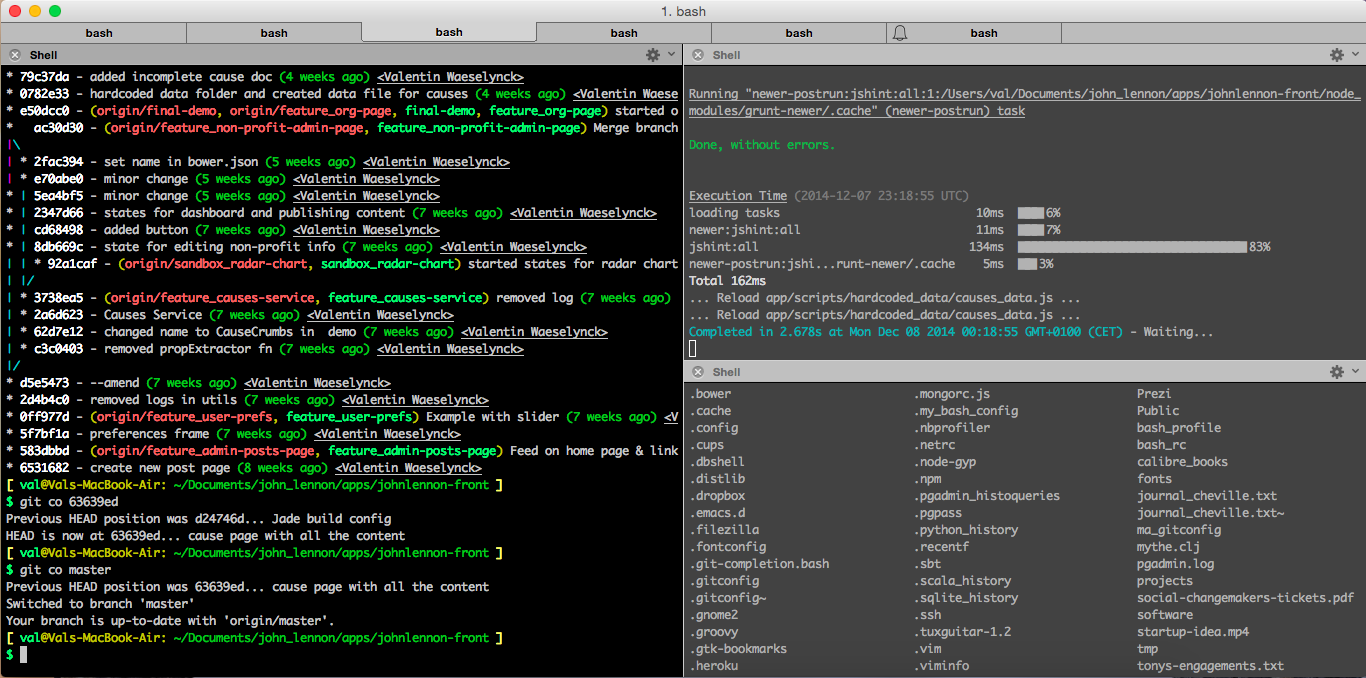
In this window, there are 6 tabs, and the current tab has 3 panes
I'll typically have one or two tabs per project; for example, for a web development project, I'll have a tab for the frontend and one for the backend. On the backend tab, I'll have a small pane for my local database server, one for my backend server, and a large one for git commands and and other command-line stuff.
To achieve such a layout, use the Shell menu of ITerm2, where you can see options to create new tabs (CMD-T) and split them into panes (CMD-D, CMD-MAJ-D). You can navigate across tabs with CMD-LEFT and CMD-RIGHT.
Having a ready-to-use terminal with profiles and window arrangements
You don't want to have to re-create this arrangement every time you start ITerm2. This is why there are profiles and window arrangements.
A profile is essentially a pre-defined file system location for a shell session to start in.
If you want to always be in the same location in a certain pane, you'll have to create a profile for it.
To create a profile, do Profiles > Open Profiles > Edit Profile, then +, then you enter the name and file system location for this profile and you're good to go.
To have a pane with a specific profile, it's a bit tricky. Place yourself in a pane, click Shell > Split Vertically, then you will prompted for a profile for the newly created pane. After that, you can close the older pane. I haven't found a more direct way.
The last thing to do to save your beautiful tabs/panes layout is to save it in a window arrangement. To do so, go to Window > Save Window Arrangement. If you want to start ITerm2 with always the same window arrangement (which you probably do), you can set a default window arrangement in the Preferences.
Wrapping up
I hope this will make your relationship to terminal consoles happier. As Obi-Wan Kenobi said to Luke in the Millennium Falcon, this is your first step into a larger world. I was actually pleasantly surprised to discover ITerm2 for Mac, I haven't found something as ergonomic for Ubuntu.